


Use the W3 optical zoom and rotating screen to frame different subjects, then choose automatic or manual exposure controls. This guide walks through power and card preparation, focus distances, recording, VD CAM access and computer or TV connections.
Power and Card Setup
Switch off before installing the NP-1203.7V lithium battery and SD card. Follow polarity and card orientation markings. Storage supports up to256GB. Choose a genuine U3 high-speed card;the manual specifies read100Mb/s and write60Mb/s or above. Back up files before formatting because all card files are erased.
Charge the Battery
Connect the side charging port with the Type-C cable to a suitable5V/2A USB adapter or power bank. The indicator stays red during charging and switches off when full. Typical charge time is2–3hours. Check cable seating and supply if the indicator does not appear.

Framing,Focus and Zoom
Turn on the camera and use the270° rotating screen for viewing. T/W changes framing using12× optical and2× digital zoom. Half-press the photo shutter to focus,then press fully to take a picture. Use the macro shortcut to select automatic macro,manual macro,AF orMF. Focus-distance limits are0.1m–infinity at wide angle and1.5m–infinity at telephoto.
Choose a Photo Mode
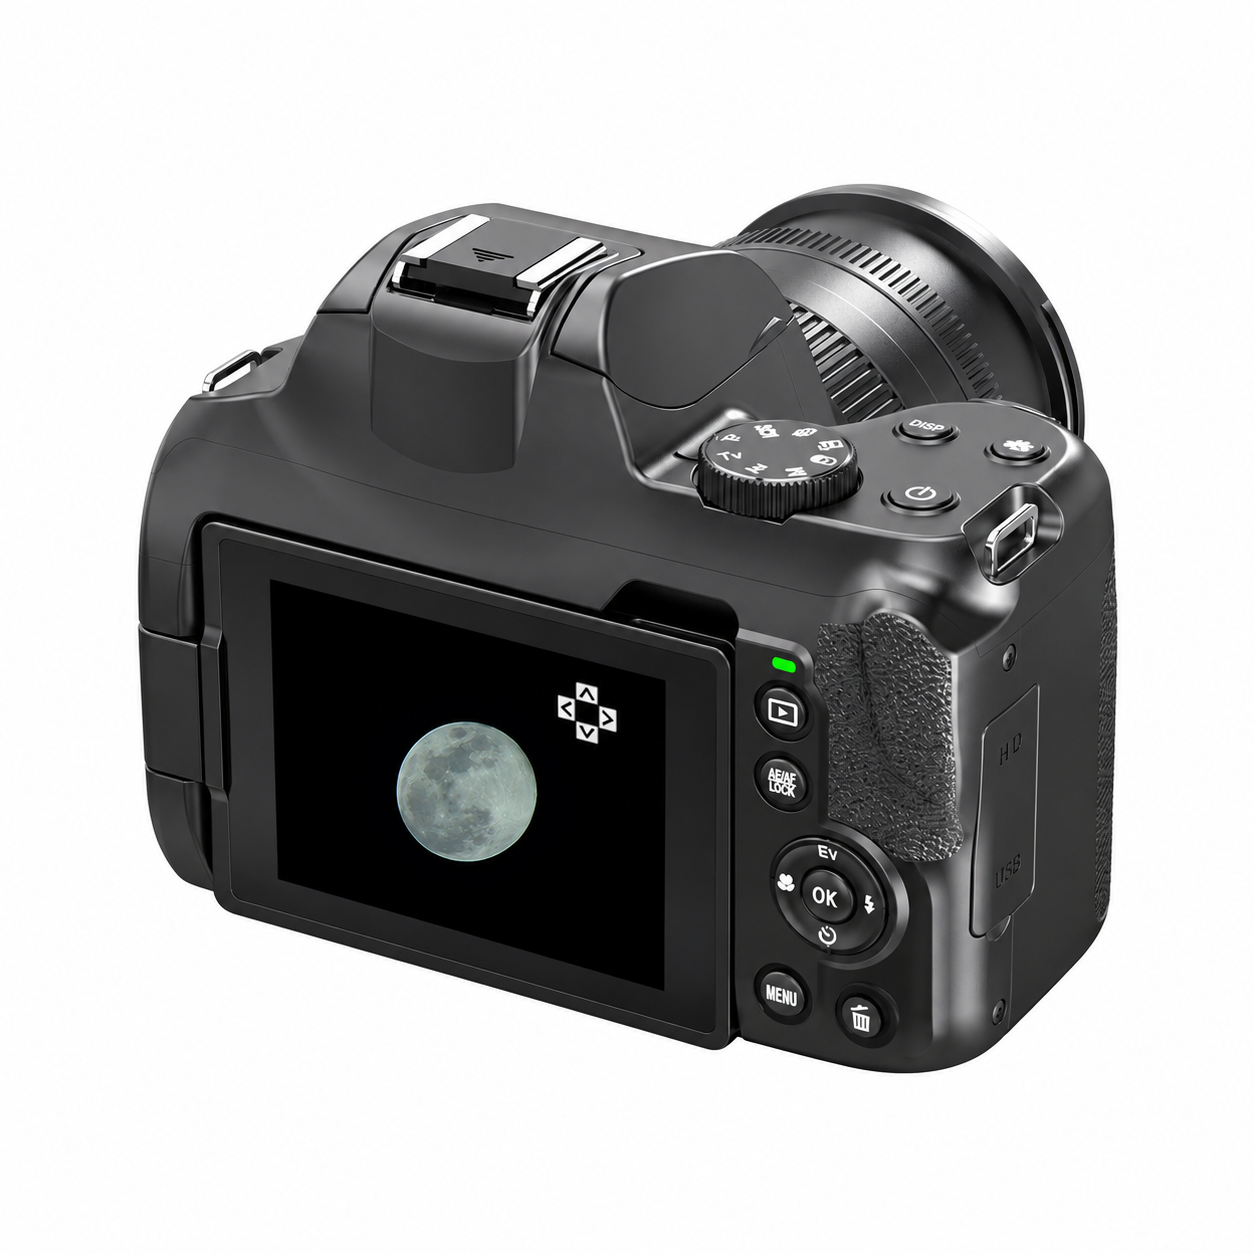
Use the mode dial for P,AV,TV,M,scene,intelligent scene,filter or continuous shooting. In M,press OK and use direction keys to adjust aperture and exposure time,then confirm. AV controls aperture;TV controls exposure time. Scene and filter functions offer10scenes and11filters. Some settings are unavailable in certain modes;for example ISO is available in P and AV,and resolution selection is not supported in continuous mode.
Record and Review
Press the recording button to start or stop video. Select2880×2160 at24fps,2560×1440 at30fps,1080P at60/30fps or720P at60fps. Set time-lapse Off,1s,3s or5s as needed. Press Playback to review recordings. Protect files you want to retain;back up files before deletion or formatting. Protection does not replace a separate backup.

Connect VD CAM
Keep the camera on. Press Menu,move to system settings and enable the Wi-Fi hotspot. On the phone join the network named W3 with its identifying suffix,using the camera credentials. Open VD CAM and select Connect Camera. Keep the phone within about10m,without a wall in between. Use the app for capture,settings and file download. Press OK on the camera to close its hotspot. An unused hotspot turns off after2minutes;other camera button functions are unavailable during app connection.
Computer and TV Connections
Connect the powered-on camera to the computer by USB. Choose MSDC for storage access or PC Camera for compatible webcam software,and press OK. For a TV,use the optional HD cable from the camera HD Out to the TV and select the TV HDMI input. Do not disconnect during file transfer.
Flash and Exposure Tips
Raise the flash when using it,and select Auto,Red-eye reduction,Forced,Slow orOff. The green indicator flashes rapidly while the flash recharges,approximately10seconds. EV adjustment ranges from−3to+3. AE/AF LOCK can lock exposure,focus orboth where supported. Test a photo after changing modes because available controls vary.
Troubleshooting
For soft focus,check AF/MF ormacro choice,subject distance and camera movement. For recording problems,check card space and speed. For app failure,check the active hotspot,distance and phone network selection;reenable Wi-Fi if the2-minute timeout expired. If the camera powers off,check charge and auto-shutdown settings. Back up before Format orfactory reset.
Related Product
View the W3 12x Optical Zoom Digital Camera with Rotating Screen for product features and configuration enquiries.
